
Well, it was a long day yesterday, but I finished a project! Do any of you remember that last July I won the "Block of the Month" at our guild? I know many guilds do a program similar--sometimes called "Blottos," etc. The way our guild does it is that they sell a block kit for $2 each. You can buy as many as you like, take them home and make them, and then bring them back. For each one you bring back, you get a chance to win all of them. This block was red, cream, and blue, thus I really wanted to win them, so I bought 5. I also suspect that some of my friends did a block, but put my name on their ticket (because quilt friends are THE BEST.) Anyway, much to my surprise, I did win them. There was a nice amount, too, around 25--plus some unfinished or never-started kits. They also give the winner the extra fabric. I brought them home and blogged about it, but I knew that sewing them together was not going to be a lot of fun because it is a fairly complex block.

This is the block--this is how it should look.
I noticed that several of the blocks were not quite right, but I figured I could fix them. Anyway, I put the whole thing away as I wasn't in the mood to work on it at the time.
For some reason on Sunday while I was in the middle of making the flower blocks, I got the urge to get them out and look at them. (By the way, I had a few comments asking me about the flowers. The petal squares are cut at 5", the background squares are 2.5" and the center square is 2." When you sew 4 of them together, the block should measure 9.5" and thus finish at 9")
So I got out the blocks of the month and counted and sorted again. I had maybe 23 completed blocks, but 6-7 had issues.

Again, this is the correct block. It looks complex, but really, it is just a nine patch made of 3 different units! The center of the nine patch is a blue and red pinwheel,

the four corners are a funny combination unit featuring a strong diagonal with a little red "wing,"

and the 4 remaining spots are filled by a square in a square unit.

If you examine the square in a square, you will see that three of the triangles are blue, and one is red.
Some of the "problem" blocks had mistakes like these:

This one looks great except that the combination units are wrong--the little "wing" is blue, not red. To fix it, I would have to rip off those units and then rip those down to the 4 HSTs and then resew them.

This one looks easy to fix--at first look, it seems like she just sewed the bottom row onto the rest of the block upside down, however, the square in a square is correct (see how the one red triangle in the square in a square aligns with the red pinwheel to form the LeMoyne star)--so I needed to take off the bottom 2 combination units, and then sew them back together correctly.
There was one with the bottom row on upside down and it was easy to fix. Problems started occurring when I would tear apart some of the units.

The four squares in the top row made up one of the combination units. They should be 2.5" HSTs. The square at the bottom is a 2.5" HST. As you can see, the pieces in the row vary greatly and some are not even squares. I'm pretty impressed that the maker of that block got them to fit together and into the block, because I couldn't. I discovered that I had to remake or "rehab" quite a few of these combination units. A few of the square in a squares had some issues, too.
I was prepared for the blocks to differ a bit as some quilters have slight variations in their quarter inch seam allowances, but I wasn't expecting some of these other issues. I found them to be pretty fun to work on--it was a bit challenging, and luckily I did have some leftover fabric to help out. Some blocks I could fix, some I had to toss, and I completely made a few more. In the end I had 26 blocks ready to sew together. (I would use 25 and if there was a block that "wasn't playing nice" I would have an extra. I needed it, too!)
Normally when you have a "group made" project like this, it is much easier to sash the blocks--that way the differing sizes are easier to deal with. In this case, the blocks made a stunning secondary pattern when sewn together, so sashing was out. As I put the blocks up on my design wall, I found some that seemed quite a bit larger than the others. I ended up arranging those larger ones diagonally through the quilt to help disperse the size difference. One of the valuable skills that I learned as a beginner/novice quilter was how to fudge things together that aren't perfect or the same size!! I used those skills here. One tip: the feed dogs can be used to ease fabric, so if one block is larger than the other you are sewing it to, you can put the larger block against the feed dogs. I fudged and pinned and played and manipulated until I got them together. Don't get me wrong! There are some "problem" areas where points don't meet or pinwheels have funny centers, but I decided that those would be part of the charm of this quilt.

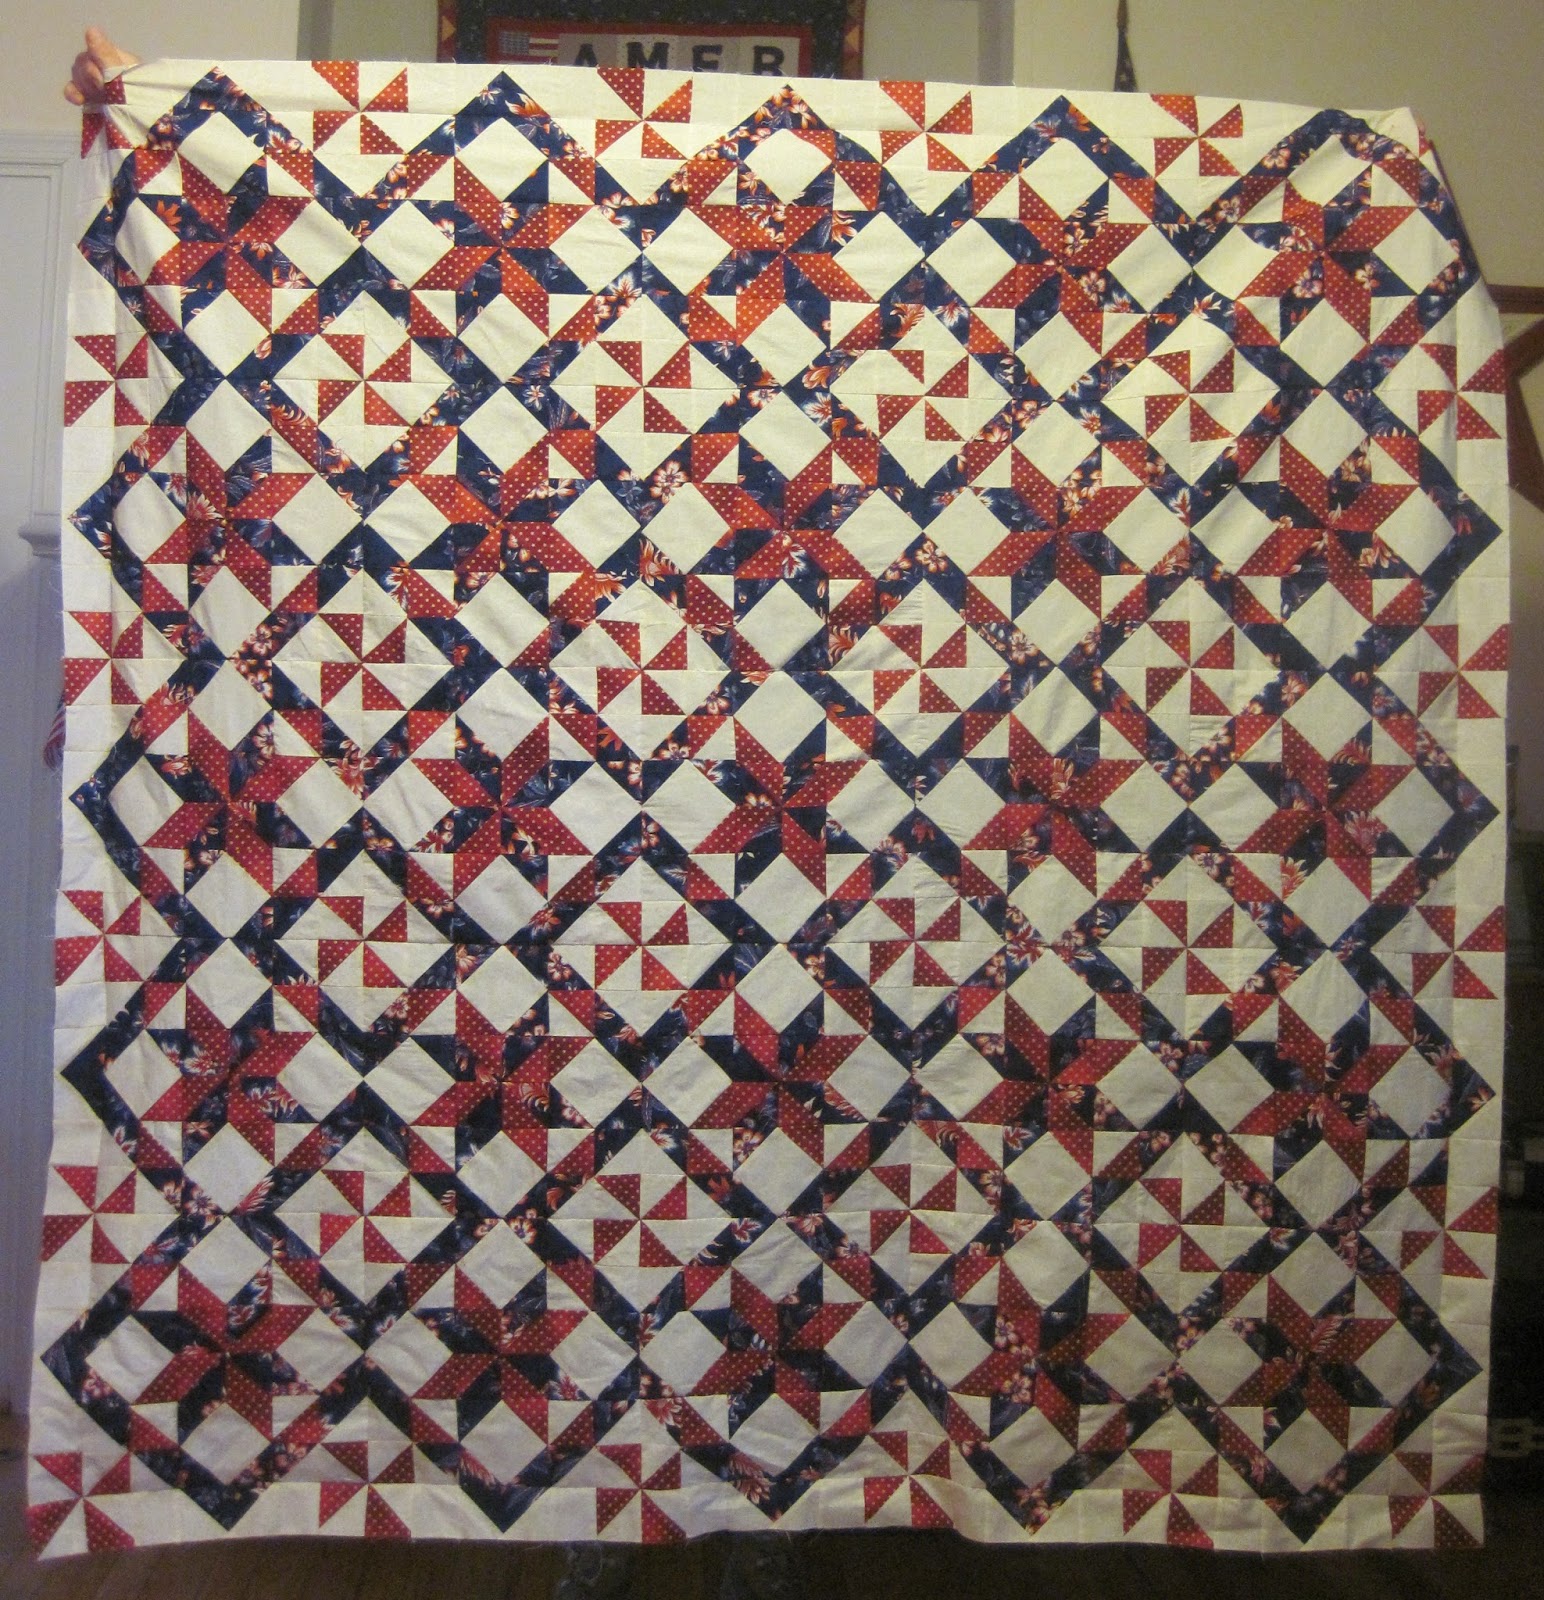
See the wonderful secondary pattern? I love it! The little red "wings" of the combination unit come together to make those darling red pinwheels!

The left edge of this picture is how the edges of the quilt were when I sewed all the blocks together. I decided I wanted to add a strip all the way around to complete the red pinwheels, so I sewed more red and cream HSTs, and then made blue and cream flying geese (to form the blue points) so that the finished edges look like this:

I think it made a huge difference!
In case anyone is interested, the block is free online. You can find it here at The Quilter's Cache.
Finshing this quilt really wasn't on my radar or plan for this month, but I've found that sometimes you just have to work on things when they strike your fancy! I'm really glad this is done.
Today I need to clean off my cutting table. I will finish the flower blocks and put things away. It is time to work on my next Blogger Girls BOM blocks, so maybe I can get to them. And there is a Schnibble this month--never fear! It is done and waiting for me to share, too!
Have a great day!
JoAnne
This is glorious. I love the pattern, going to download the pattern now. Thanks so much for sharing. beautiful finish.
ReplyDeleteBlessings,
Jodi
Wow JoAnne! You have been super busy. I love the way your quilt came together, you were so patient and diligent in making the corrections. I love the extra red and cream blocks, they are a perfect addition!
ReplyDeleteLooking forward to seeing you Schnibble :)
Good call on the extra row on the edge. It really gives a nice finish and it is a beautiful quilt!
ReplyDeleteWow!! You are a miracle worker with those blocks. I don't know if I'd have the patience to fix all of that. When I saw the individual block, I thought "eh," but seeing all the blocks together and the secondary design...wowzers! I love it! Great job!
ReplyDeleteI love this quilt RWB is what I am always drawn to and the red pinwheel is so cute.
ReplyDeleteWhat a Gorgeous quilt ! It must feel so good to call this quilt a finish! I enjoyed reading your story about how this quilt came about !
ReplyDeleteIt came out just wonderful and good for you. Love the way you shared the process.
ReplyDeleteIt's lovely! I love the secondary pattern, as it adds a lot to the quilt. Nice finish!
ReplyDeleteBeautiful... and I love the 2ndary pattern! And the extra "round" makes it perfect! Off to down load the pattern... I have some CW fabrics to use up!
ReplyDelete:)
Just stunning with the secondary pattern. Your persistence paid off! I'm not sure Ii would have stuck it out, I hate unsewing.
ReplyDeleteCongratulations on your lovely finish :-)
ReplyDeleteI know how difficult it is to sew together blocks made by other people. Congratulations on a beautiful finish!
ReplyDeleteGreat effort, great result, great Guild!
ReplyDeleteThis quilt is fantastic! And that extra row all around makes it perfect! HUGH difference is right! I love it! And I love that you worked out all the funky parts and had it turn out so nice! I think that is more patience than I'll ever know! :o)
ReplyDeleteYou've got to be excited to see the top together! I love that secondary design of pinwheels. I learned long ago that guild block exchanges come with challenges. You've overcome! LOL
ReplyDeleteIt was worth the effort--the quilt turned out beautiful! I was just talking about exchange blocks yesterday with a friend and we agreed it's risky, but also very rewarding!
ReplyDeleteLove the fabrics in this quilt! You did a great job putting them all together and adding that extra strip on the sides. It will be a nice way to remember your guild friends.
ReplyDeleteIt's always interesting when you put things together from different quilters. It's just another reminder of how different we all are, but then again that's what makes it so much fun! I'm glad you had enough material to finish it. I think it looks great!
ReplyDelete