
I realized that a blog post about my new sewing room would be gigantic, as there is lots of thoughts and photos that I want to share, so I'm going to break it down into three separate posts:
And the third one about the finish
Finally I get to show you around the room! There has been a lot of explanation, but I wanted to share my thought process as well as the finished room.
Are you ready to go in?

When you open the door, this is the view of the room.


This is the same angle of the room when we first looked at the house. Aren't before and after pics great? And also, I love how the yellow walls look!
We will travel around the room clockwise. To the left of the door is a bit of wall space and then the closet.
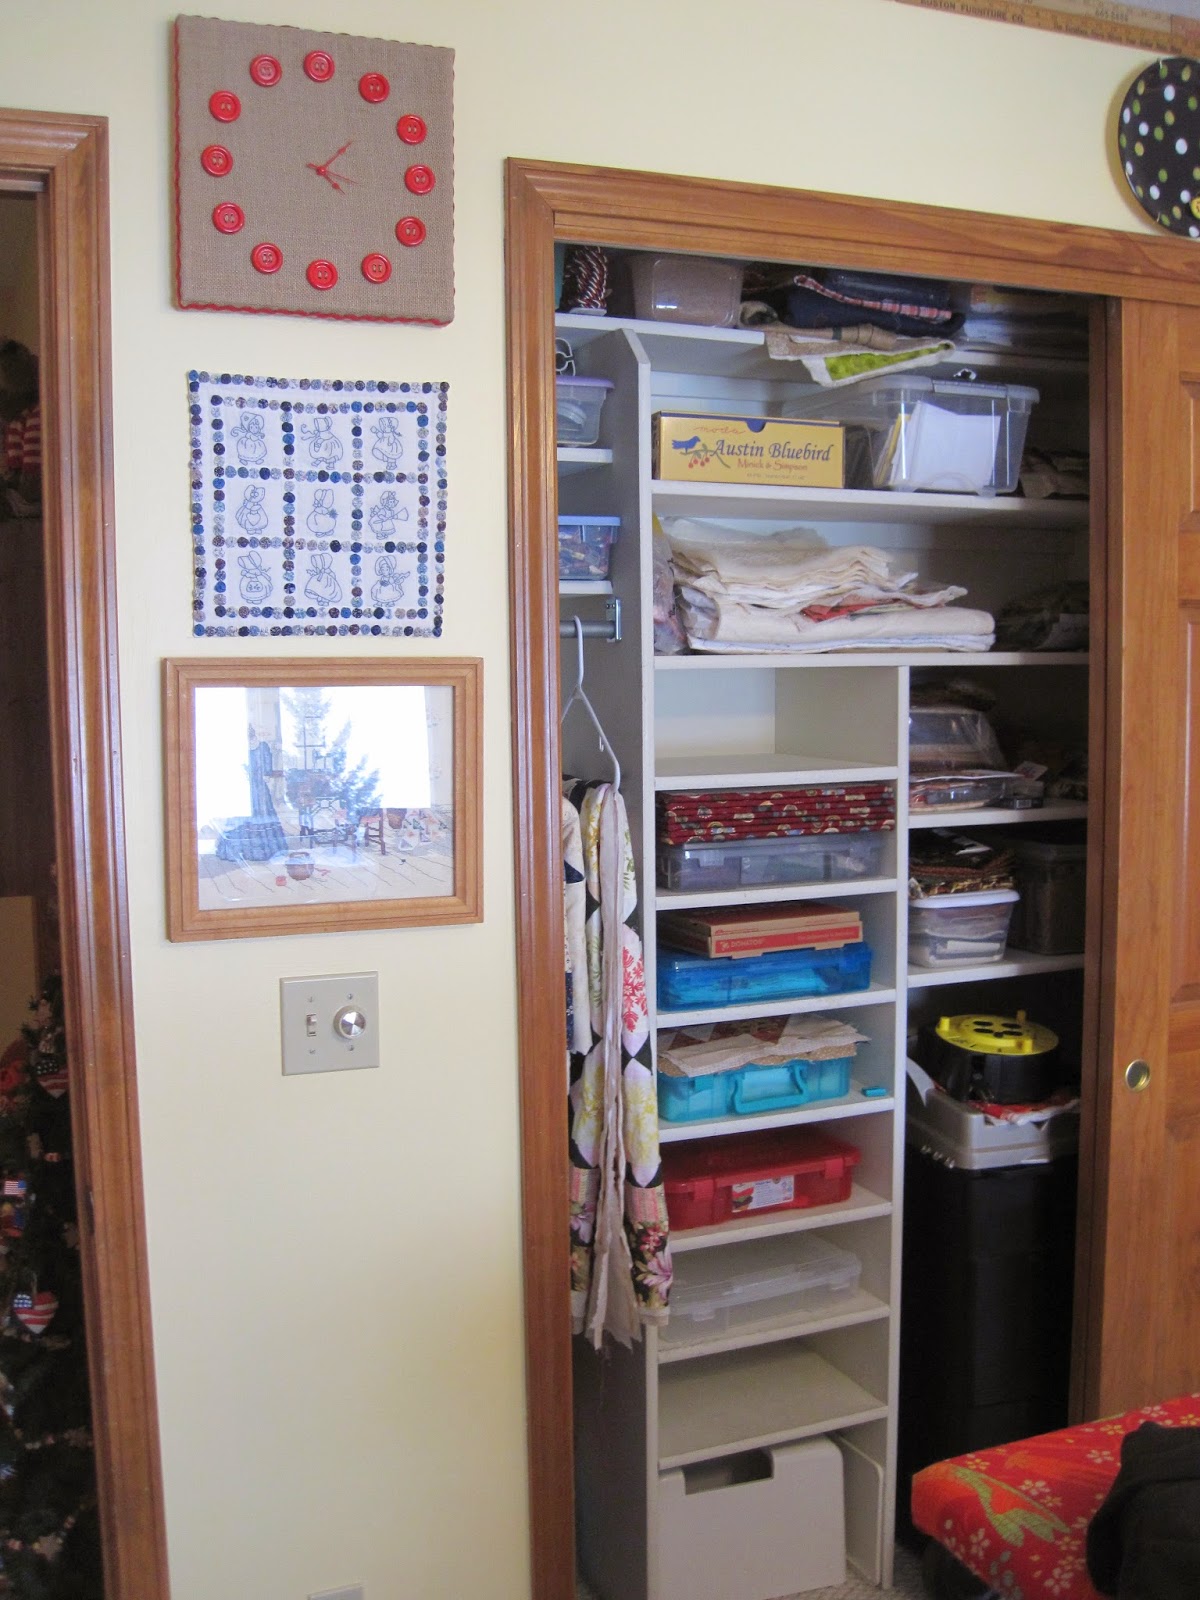

The left side of the closet...

And the right side.


The one on the left is full of thread! The bottom drawers are deeper and hold cones of thread perfectly. The drawers in the other cabinet have notions, my machine quilting necessities, etc.
The center Alex door cabinet has two shelves for deep item storage--like my roll of freezer paper and other large items.
Above the machines is my wall of minis and other favorite items.

Aren't the red scissors great? My friend Linda got up early and went to the local quilt shop in Virginia one morning because the shop was having a rummage sale of display items. She thought I needed them and I just adore them--mostly because I think of her whenever I look at them. I still have my "N" (what does it stand for? Nothing, heh heh heh.) On the right side you can see the edge of the first of the Billy bookcases.

Remember, this is the "L" shaped unit that I needed to use the narrow bookcase instead of the wide one. You can also see how we butted the bookcases against each other in the corner. All three of these pieces are attached together in the back. We used 3 angle brackets to do the corner, and then 3 metal "straps" to add the narrow bookcase on to the corner bookcases. We did the same in the other corner--you can't skip out on safety features! I have all of my fabric over here on this side because the sun comes in the window at an angle and mostly shines on the other side of the room.

This is a different view of the same corner. I left one shelf out of the narrow bookcase so I have room for bolts of fabric. The bottom large shelf is filled with rolls and large pieces for backings.

My Great-Grandmother's treadle fits perfectly in front of the window. As of right now I don't have a window treatment. At some point, I may make a valance, but I don't plan to cover the window too much.

Now for the other set of Billy shelves. This side is more for display, although I've made sure to have plently of room for increasing fabric. I forgot to mention in the earlier posts that is is extremely important to me to have "growing room."
See the red crate that I have thread in for display? Linda also got me that at the same sale as the red scissors.

I shopped in several places for red baskets and containers for hidden, but pretty storage. (I had luck at the Container Store and Hobby Lobby.) I love how the shelves almost reach the ceiling. I considered the shorter shelves, but I knew if I did, I would just pile stuff on the top, so I did the taller shelves--they look neater this way.

Next are the Trofast units for fat quarter storage. You can see one of the bins is missing--I had it on the cutting table. It is so easy to grab the bin of the color that I need. I have been using these for nearly two years now and still LOVE them. For my third unit, I got one of the double containers (it takes two slots instead of one--you can see it on the bottom right) and it has some precuts inside.
I found the apothecary cabinet that is on top of them at Hobby Lobby and couldn't resist. I may repaint some of the drawers, but for now they are fine.

On top I got some cracker jars and painted the lids and added pretty drawer knobs for handles. This is also an idea by Lori Holt.

The apothecary drawers are already filled with things like rick rack, bias tape, lace, etc. I've labeled them all, too.


Another feature that I wanted was a bulletin/inspiration board for notes and ideas, etc. My husband and I made this from a sheet of homosote (only $5 in the "slightly damaged area of the local home improvement store) covered with batting and fabric and stapled. I added the ribbon and used upholstery tacks where it crosses.

The inspiration board leads back to the doorway. Down the middle of the room is the cutting/ironing island. It measures three feet wide by 89 inches long. With the fabric cover, I can remove the cutting mat and use the entire surface for ironing! It's amazing.
I've mentioned before on this blog that I collect yardsticks. It may seem weird to some, but I love them since they are used for measuring--they remind me of fabric. I love old wood, and history, and I've tried to find sticks from places we have lived or felt a connection. I have a Pinterest board of yardstick ideas and I always knew I wanted to use them somehow in my "forever" room. I ended up using a double layer as trim around the top of the room. I love the effect that they have: I feel surrounded by "yards of history and memories." In the picture below, Hawarden is my husband's home town.


Here is the closet with the design wall in place. The small quilt is the free Valentine's Day project from the Temecula Quilt Co.
I said that the number one requirement in this room was lighting. So far I haven't changed it at all. With the new wall color, all the reflected light off the white shelves, and the window, it always seems bright in here--even at night. Although this room is smaller than the one in Virginia, I think it has way more storage and I like it even better.
I have plenty of storage--and while the shelves seem full now, there is lots of room for more fabric, etc. Some of the shelves are full of project "piles" containing everything need--I just have to grab a pile and begin to make it. Also, one or 2 shelves has all of the pre-cut pieces for an on-going major project.
With my major requirements fulfilled, and the room filled with everything I love (and nothing I don't,) this room is my dream. I LOVE to be in it! There isn't a comfy chair or a tv--those are elsewhere in the house, but I do have my ipod and a cd player for my favorite sewing listening: audiobooks when I cut and piece and music when I machine quilt.
My last tip is that I plug the iron into an extension cord that is right next to the door. It is easy to see if I remembered to unplugg it as I leave the room.

As nice as the room looks, it functions beautifully! I don't do "pretty" just to be pretty. I need everything to work easily--and it does. I think that is my favorite thing about the room.
Well, that and the view out the window. It changes every day.

Thanks for taking the tour with me!
JoAnne
I have enjoyed visiting your progress with your new sewing room - what a wonderful place to create. Functionality is key and you have that in this room. Just love it all but the large cutting/ironing table - oh, I think that is brilliant!!
ReplyDeleteWell done! Both the room and the posts! I'm still struggling with my new sewing room and I've been here almost a year now. I'm now thinking I will switch rooms but waiting to have some plaster work done and getting some storage type furniture from my MIL who is moving into a retirement home. I've just gotten comfortable with playing in the disorder of my current situation. Thanks for the inspiration and happy stitching!
ReplyDeleteI am GOB STRUCK by the functionality and BEAUTY of your "forever" room!! Job well done, JoAnne!! Over two years in to living in our home and I've made little headway in organizing my space. I carved out a place to sew but as far as storage is concerned I have a long way to go. My stash is just TOO large and diverse ... seriously ... I need to get a grip and donate some for charity quilts and to local resale organizations. I will never, ever use it all and it seems to paralyze me from moving forward with organizing and being productive. Wonder why we have such a difficult time divesting ourselves of "stuff"?? Anyway ... it's beautiful and I am SEW happy for you. Can't wait to see the spectacular creations that come out of that little haven of creativity! Linda
ReplyDeleteLove it! Where did you find the fat quarters storage?
ReplyDeleteJust loved your blog on your thoughts, planning and finish of your sewing room. What a great space and looks like you will enjoy many hours sewing and creating in there....Love it!!!
ReplyDeleteJust wow! A perfectly planned inspirational place for creative play. I love your wall of minis, and the apothecary cabinet. With the colored drawers, it looks like a quilt.
ReplyDeleteWishing you many happy hours in your dream room.
WOW, JoAnne!!!! What an awesome space you have there!! I am not nearly that organized and creative to come up with all those ideas for your sewing area. I just kinda throw stuff in there. And I have a very bad habit of stacking stuff on services and then those surfaces aren't usuable. You did a fantastic job of planning and creating to make it just the way you wanted and it turned out FANTASTIC!
ReplyDeletethat was supposed to be stacking stuff on SURFACES (DUH!). And I did NOT comment at 4:36 HAHA It was actually about 4 hrs. after that.
DeleteThanks for sharing the whole ""experience"!
ReplyDeleteThe end result was a big "WOW" as I was sure it would with all your careful planning.We were both packing up our stash at the same time but I'm sad to say that I am still looking at the forlorn "for sale" sign on our snow-covered lawn. Thank you for the inspiration and since I have the dimensions of my future room, I will go plan on paper with your pictures in my mind.
ReplyDeleteAbsolutely love your new room. I appreciate that you've taken us through every step. Most of all I'm happy that you were able to create a space that will serve you well for decades to come.
ReplyDeleteI'm really hopeful that you will open up your grandmother's machine and give her a good oiling and use her to do some piecing in front of that wonderful window. Are you going to let us have a look at her?
Congratulations on your accomplishments and your wonderful space!
Wow, wow, wow! Yours is one of the most amazing studios that I've ever seen JoAnne! The lengths you've gone to with the designing of it is mind boggling and every one of us is green with envy! My hubby built shelves for my fabric - and a large cutting table - but everything else I have came from a thrift store so it's mis-matched - not nicely coordinated like yours. You're not weird at all to collect yardsticks - I do that too. I have a few 4 ft yardsticks that are fun, but last week for the first time I saw a FIVE foot yard stick! I wanted it so bad, but it wasn't for sale - sigh. Can't wait to see the projects you make in your new quilt room - - -
ReplyDeletePS - On the wall just left of your sewing machines there is a spice rack with little jars, but I can't see what's inside so now I'm curious. Buttons maybe?
DeleteSuch great ideas!!! I think I love the sewing station the best. Room for you and room for a friend.
ReplyDeleteAll that, plus a view! You are very fortunate. I'm sure you'll love, love, love this sewing space.
ReplyDeleteLooks like a space any serious quilter would enjoy. Well done.
ReplyDeleteWOW That is some quilting room--I am envious! We do not have an Ikea in our area but I see a road trip in my future. When it comes to quilting function trumps pretty (yours is both)
ReplyDeleteI love your room and the view!! Turned out great! I'm sure you are anxious to start spending time in there! Congrats!
ReplyDeleteWhat a fun tour we have had! You have certainly made the most of your space. I love how well thought out everything is. Isn't it nice to have a place you love? When I walk into my sewing room I feel happy and I sense a creative energy in the room. I'm sure you can feel that here! : )
ReplyDeleteEverything looks wonderful :)
ReplyDeleteI was starting to wonder if you still had your red button but lo and behold, the next picture was the button.....
I can see why you are happy in your space. Enjoy!
Peggy
What a fabulous room! Thanks for going into so much detail over three posts. You've given me a lot of ideas for my future dream sewing room - maybe when I retire.
ReplyDeleteLOVE LOVE LOVE it!!! Very well planned out and executed. Thank you for sharing JoAnne...you've definitely inspired me.
ReplyDeleteYour room is beautiful, JoAnne! I love the buttery yellow walls, the white shelves, and all the storage space. It's wonderful to have everything so readily available. I'm not usually an envious person but gosh, I'd love to have a room like yours! Enjoy!
ReplyDeleteAll I can say is "wow" amazing, fantastic and I love it!
ReplyDeleteWhat a great space - the tour has been so much fun! Don't you just love your new room? I've had mine now for 8 years and I still love everything about it!
ReplyDeleteYour new space is wonderful! I've had to reorganize my sewing machine space and need to get new/different lighting. Your machine lights seem like they'd work in my limited space ... if you could share details (where you got them, model names, etc.), I'd really appreciate it.
ReplyDeleteWow--what a great reveal! If my sewing room looked like yours, I would never be able to leave it! You should seriously consider going into the business of designing sewing spaces--everything is so well thought out--awesome!
ReplyDeleteYour room is very enviable. One tip I have for the iron reminder. Plug a light into the same extension cord or better use a strip that you shut off with one button. When the light is on so is your iron. When off so is your iron. It helps me remember. Mine has no auto shut off.
ReplyDeleteLove it all! I especially like the large ironing surface in the center of the room.
ReplyDeleteLove, love, love it!! Great job...love how functional every space is!
ReplyDeleteOMG !!! WHAT A AWESOME SEWING STUDIO !!!!
ReplyDeletePERFECTION ! I am SO happy for you , you " SEW " deserve this room :-D
Not only is your new room beautiful to look at, it's obviously well thought out. I'm sure you're going to have a wonderful time creating in there. And your view is amazing!
ReplyDeleteI love hearing about the whole planning process of your new studio! I'm going through something similar right now as we have just moved into a new home and I have a large studio. Thanks for sharing! It looks awesome!
ReplyDeleteFound your series of articles on your dream room by following a Pin. So glad I checked it out! We are now empty nesters in our small 1000 sq ft home. I am putting my studio in the largest of our three bedrooms (it's even larger then the master and attached half bath!)
ReplyDeleteI've started my shopping list for Ikea and already had the Billy bookcases on my list. Glad to see they are working well for you! I am hoping to add the glass doors to keep things dust free. I hadn't noticed before the Trofast drawer units. They seem perfect for fat quarters. I've added them to my shopping list!
I have two of the Raskog Utility carts. One sits next to my recliner in the living room and keeps my current embroidery project supplies on top, odds and ends in the middle shelf like remotes and guides, and my library books and magazines in the bottom shelf. I use the other cart in the studio next to my sewing table to organize by need-close-hand items in top, various templates and rulers in the middle and current project in the bottom.
I look forward to exploring your blog!
We are planning on building so the sewing studio will be included. I have considered Ikea for the house so nice to read how you incorporated the products. I very much appreciated the detail. Lots to consider; however, perhaps I missed it but did not notice what you did for lighting which is so very important. Thank you for your willingness to share. May you enjoy your creative time and make many wonderful memories for yourself and others.
ReplyDeleteWe are planning on building so the sewing studio will be included. I have considered Ikea for the house so nice to read how you incorporated the products. I very much appreciated the detail. Lots to consider; however, perhaps I missed it but did not notice what you did for lighting which is so very important. Thank you for your willingness to share. May you enjoy your creative time and make many wonderful memories for yourself and others.
ReplyDeletePOSITIVELY GENIUS!!!!!...making your cutting and ironing station one and the same! What a space saver - I'm going to do the same thing. I realize your post goes back a while but I so happy to have found it. Thank you and blessings to you - I hope you continue to enjoy your room for years to come!
ReplyDeleteP.S. Hope you see this 'cause I'd really like to know how many layers and what type of batting you used for that fabulous ironing table. Many thanks in advance for your reply.
So I'm late to the party here commenting lol BUT WOW. I love your ironing table/cutting table but that view is AMAZING. I grew up in the country so I love wide open views like that. :)
ReplyDeleteI am unable to read articles online very often, but I’m glad I did today. This is very well written and your points are well-expressed. Please, don’t ever stop writing.
ReplyDeletespie auto
Your room is beautiful, and a source of so many great ideas. Love your yard stick "border". Seeing the familiar *Hawarden" and "Yankton S Dak" brought a smile to me here in Sioux Falls.
ReplyDeleteBeautiful functional space, great ideas like you sewing table, storage and love that ironing board!
ReplyDelete