
Today I'm giving my tutorial on how to make a scalloped border for your quilt. This is going to be a long post with lots of pictures! First, go ahead and layer your quilt and quilt it as desired. Once it is all quilted, trim the backing and batting even with the edge of the quilt.
The tutorial that I learned from is by the incredible Bonnie Hunter. You can find it here. I really encourage you to visit and read her instructions first. She is doing a larger quilt and when you come back here, I will show you how I adapted it to a smaller quilt.
Are you back? Wonderful! Now for my input and photos.
The number one thing to know before you begin is that you MUST USE bias-cut binding. You will not be able to do this with straight of grain binding!! So go ahead and make your binding and set it aside.
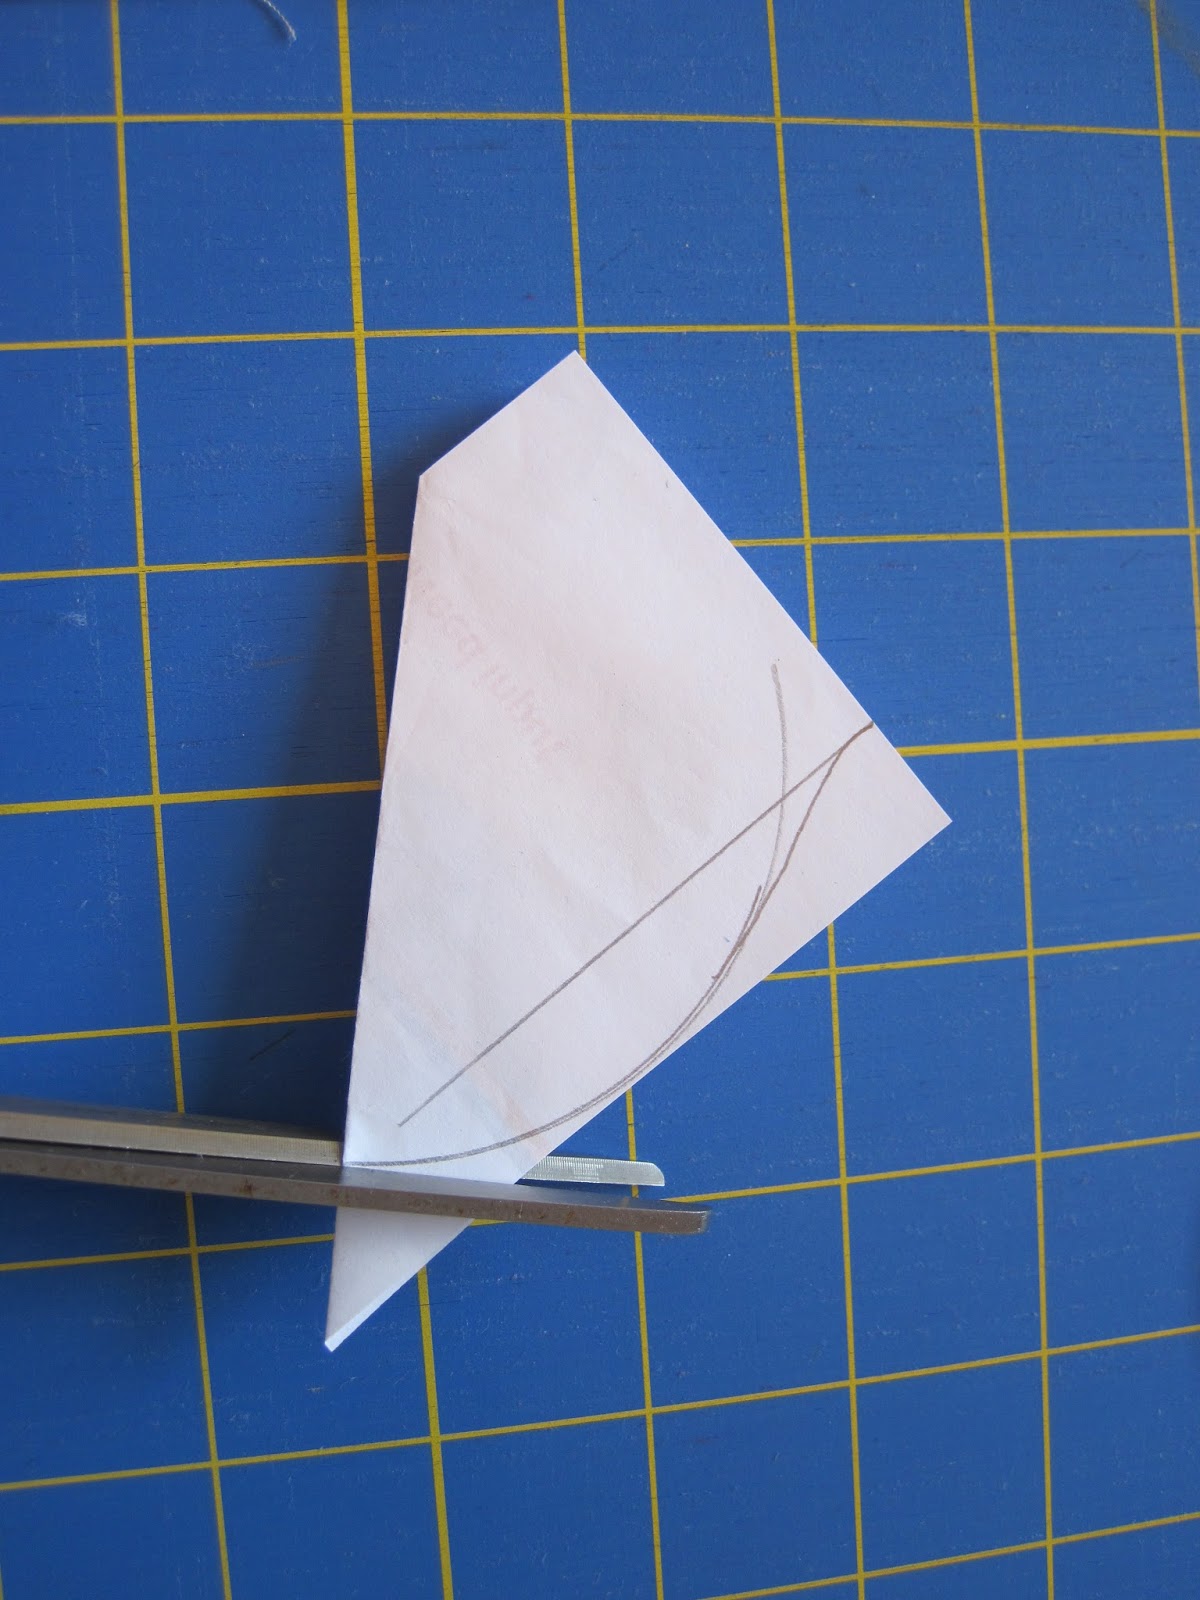
The technique that Bonnie used is to cut two shapes--one corner and one "hump." To cut the corner, you will cut a square of paper that is larger than your border is wide, by around an inch or so. Fold it in half diagonally.

Make a line at the seam between the outer in inner border, and then cut that small triangle away.

Next, grab a bunch of whatever round things you have laying around that might be the right size. If you are doing a bed-size quilt, glasses, bowls, and plates may be your friend, but for this I grabbed a couple different jar lids and my roll of blue tape. Lay out your circles on your corner piece until you find one that is "just right." You don't want the corner to be too small, nor do you want a curve that is too big.

The second thing you must keep in mind is that you don't want to attempt scallops that are too deep!!! Bonnie says to keep it under one inch from the hump to the valley. I used one inch on Canasta, but then realized that Bonnie was doing a larger quilt, so the scale was larger. I had a bit of trouble binding the one inch difference, so for this one, I only allowed a half inch difference. To help me, I drew a line a half inch from the outer edge of the pattern.


Then fold it back in half and trim your drawn line. I actually found it was easier to make a graceful curve cutting than drawing.

Voila! The corner template is done!!
For the next photos, I cut a second corner template, but you don't have to, just make a mark where one corner ends.
The next step is to measure the distance between the corner templates on each side of your quilt.


And the sides measure just short of 17 inches. Bonnie's technique allows for measurements to not be totally exact.
Now it is time to do some visualizing and math:
I know that I want more than two "humps" across the top and bottom. So I did the math for 3 and for 4.
13" divided by 3 is 4.33 inches. So if I did 3 humps, each one would measure 4.33"
13" divided by 4 is 3.25 inches. So if I did 4 humps, each one would measure 3.25"
The sides are longer by 4 inches than the top/bottom. If I'm thinking about 3 or 4 humps for that edge, the sides should have around 4-5 humps, so the math for that looks like this:
17" divided by 4 is 4.25 inches. So each hump would measure 4.25"
17" divided by 4 is 3.4 inches. So each hump would measure 3.4"
You are making one template for all the humps, so to have them as close to the same size is very important. The math is looking good because the humps on both sides are very close: 4.33" and 4.25" in one case, and 3.25" and 3.4" in another. Brilliant! If one set of measurements was way more close than another, that is the set I would use. In this case, I could do either. To help me make up my mind, I cut templates for both.
I cut pieces of paper as wide as the outer border and then subcut one 3.25" and another 4.25."

I used my assorted circle "templates" to draw the curves.


I laid out each template with a corner to see which one I liked. Again, trust your eye.

This is the shorter one

This is the longer one.
To me, I prefer the longer one--the shorter one looks more "bumpy" than graceful. I decided to use the longer one.
Now all you have to do is trace around the templates to mark the scalloped line. I put the hump piece on template plastic to make it easier to draw around, but the corner was fine as just paper. I began by doing all four corners. Then I placed the humps. On the top and bottom, since it has three humps, I first centered the piece over the center of the border and traced, then I placed the template between the traced line, and the corner.


Once it is all stitched, then you trim the quilt to the scallop.
Next you just hand stitch it down the same as any other binding. I found that I really like using the clips for this binding. Best of all? No corners!!!
I hope this helps any of you out there wanting to try one of these borders. Give it a try and I hope to see some of your results!
Have a great day!
JoAnne
Thanks, really good tutorial. I've made one scalloped border but the template was included in the pattern. Now I can add one to any quilt!
ReplyDeleteExcellent, JoAnne! Love how you accessed round items to use for your templates... *lol* ...I do the same thing myself. I think I'm gonna have to make something so I can try this scalloped border thing... I love the math part of it!
ReplyDeleteThis is so great JoAnne! One day I hope to make a quilt and with all of your helpful tutorials I think I will have success!
ReplyDeleteBrilliant! I never would have guessed that you sew the binding on and THEN trim the quilt edges to match. I can't wait to give this a try. Thanks for all the great photos - it helped a lot to understand the technique!
ReplyDeleteThanks SO much for the tutorial ! I have always wanted to make a scalloped border now I can !
ReplyDeletePerfect - I love scalloped edges but was too scared to try it. Now, I would be more comfortable.
ReplyDeleteGreat tutorial! I'm definitely a visual learner so the pictures were very helpful. I haven't sewn a scalloped border yet so this will come in handy.
ReplyDeleteThanks for the great tutorial,will have to give it a try in the future. I like the way you boss your binding around to make it behave. lol
ReplyDeleteGreat tutorial JoAnne. You make it all seem very logical!! I can see one of these in my future now!!
ReplyDeleteThis is such a excellent tutorial, JoAnne. Thanks so much for recording the steps then posting the photos and directions. One of these day I may try a border like this.
ReplyDeleteYour step-by-step instructions and clear photos make it so much easier for a beginner like me to understand and follow along.
ReplyDeletehttps://www.promocodehq.com/blog/can-you-use-a-walmart-gift-card-for-gas/
"I've shared this blog with my friends and colleagues because I believe it deserves recognition. It's a hidden gem that more people should discover."
ReplyDeleteparking spot promo code
"I appreciate the author's commitment to fostering a sense of community among their readers. It's not just a blog; it's a place for like-minded individuals to connect."
ReplyDeleteOne Blood Rewards Code Coupons